


Create OAuth2 API Server using Spring Boot
Creating a resource / API server using Spring Boot Framework


In the previous article of the series, we created a Single Page Application (SPA) using Angular Framework. And we used OAuth2 and OpenId Connect to authenticate users. In this part, we will create an API server using Spring Boot framework which will provide some APIs to be consumed by SPA. API server is called Resource Server as well.
Create a Spring Boot project
There are multiple ways to create Spring Boot project. The method I like most is using Spring Initializr website.
- Head over to start.spring.io.
- Select Maven Project as Project and Java as Language.
- Keep the default selected version of Spring Boot. At the time of writing of this blog, it is
2.6.1. - Select Jar as Packaging.
- Let's use Java version
11. - Fill rest of the fields as needed.
- Click on Add Dependencies button.
- Search for Web in the search box and Select Spring Web dependency. Spring Web dependency is used to create RESTFul APIs.
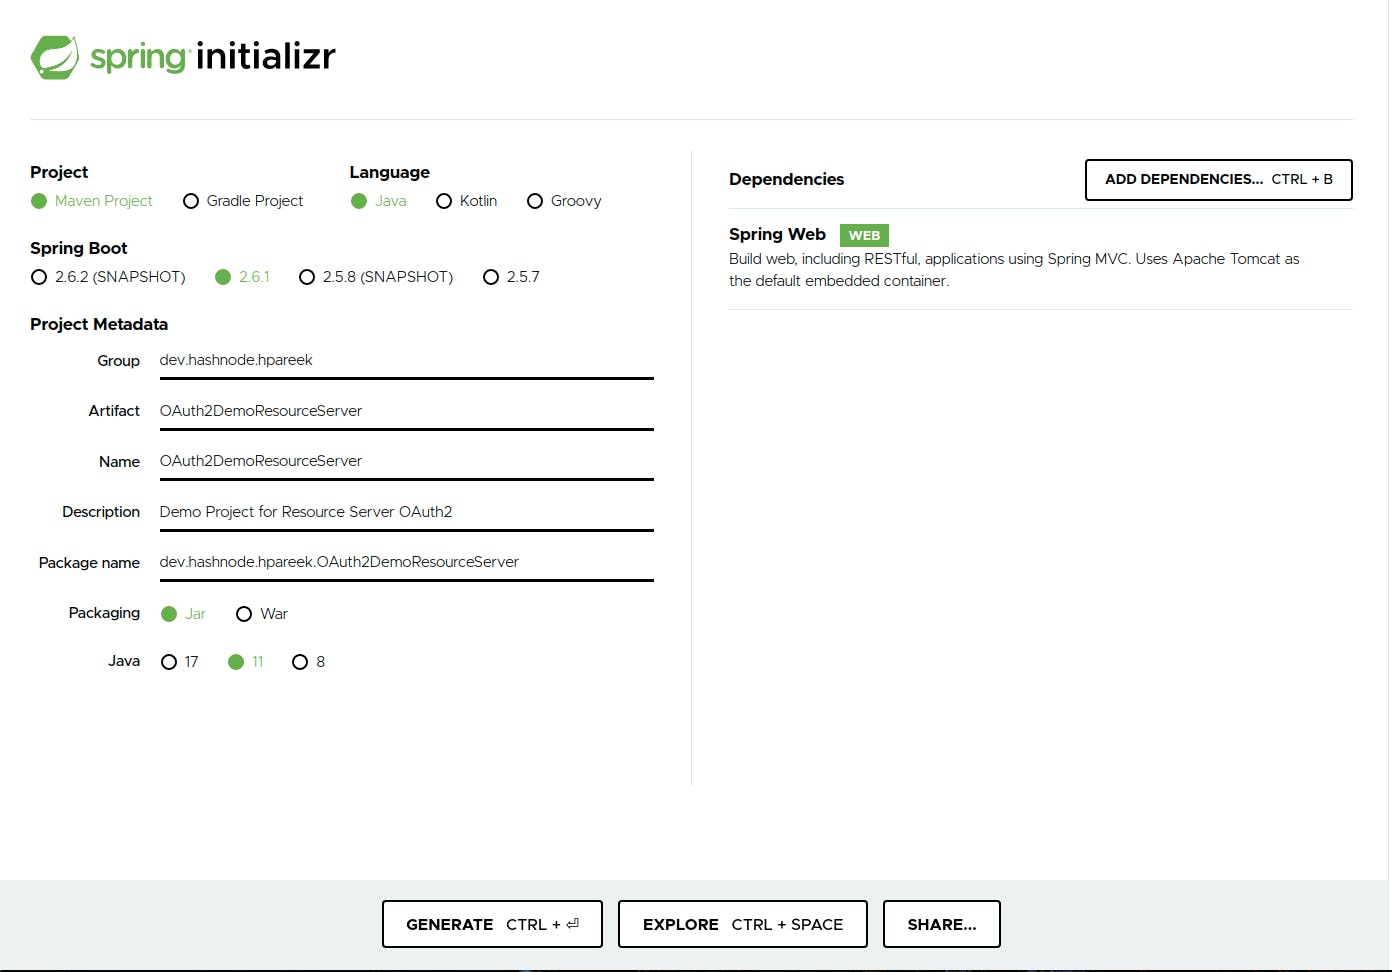
- Click on Generate button. This will download a zip.
- Extract the zip file. You can delete the zip file after that.
Run the project
Its time to run the project. Open the project in your favourite IDE. I will tell the steps for IntelliJ IDEA.
- Open IntelliJ IDEA. You will see a welcome screen.
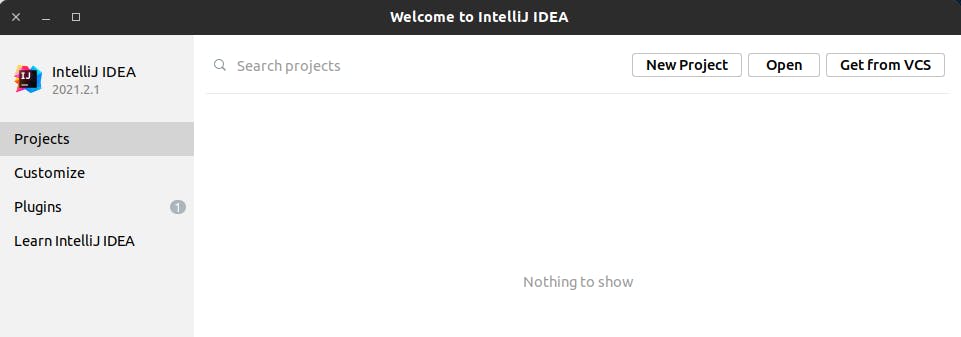
- Click on Open button.
- Select the extracted directory.
- Click on OK or Open.
- If you see a popup to trust the project, click on Trust Project.
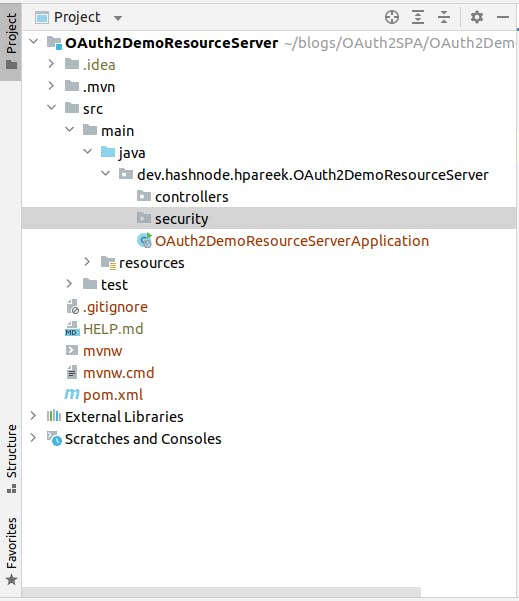
The project opens in IDE. It takes some time to resolve the dependencies. The progress is visible in the bottom of the IDE. Let's wait for it to complete. Create 2 package with name controllers and security as shown in the image below.
 Create a file
 AuthorController.java inside controllers package. This will be a rest controller for our application. Replace the code of AuthorController.java with the following code:
package dev.hashnode.hpareek.OAuth2DemoResourceServer.controllers;

import org.springframework.web.bind.annotation.GetMapping;
import org.springframework.web.bind.annotation.PathVariable;
import org.springframework.web.bind.annotation.RequestMapping;
import org.springframework.web.bind.annotation.RestController;

import java.util.ArrayList;
import java.util.List;

@RestController
@RequestMapping("/authors") // This class handles requests for /authors
public class AuthorController {

    @GetMapping("/all") // This method handles requests for /authors/all
    public List<String> getAuthors() {
        List<String> authorList = new ArrayList<>();
        authorList.add("Author 1");
        authorList.add("Author 2");
        authorList.add("Author 3");
        return authorList;
    }
}
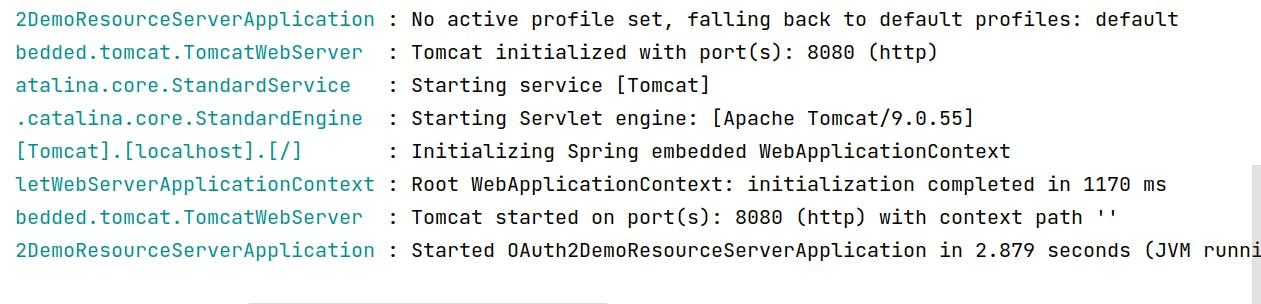
In the code above, AuthorController class handles requests for /authors endpoint. getAuthors method handles requests for /authors/all endpoint and returns a list of some dummy author names. Run the server by clicking on green play button. The server runs on port 8080 as shown in the image
 Go to url
 http://localhost:8080/authors/all in browser and we can see the response from the server. We have not added security yet, so we are able to access /authors/all endpoint. Now, we will add security to the project.
Adding Security Dependencies
We need 2 dependencies to make this server secure using OAuth2.
spring-boot-starter-securityis required to prevent unauthorized access to the protected resources of the server. Add these lines inpom.xmlfor this dependency:<dependency> <groupId>org.springframework.boot</groupId> <artifactId>spring-boot-starter-security</artifactId> </dependency>spring-boot-starter-oauth2-resource-serveris required to make this server capable of using OAuth2 protocol to verify the access of the user. Add these lines inpom.xmlfile for this dependency:<dependency> <groupId>org.springframework.boot</groupId> <artifactId>spring-boot-starter-oauth2-resource-server</artifactId> </dependency>After adding the above dependencies, the
dependenciesnode of thepom.xmlfile looks similar to below code:<dependencies> <dependency> <groupId>org.springframework.boot</groupId> <artifactId>spring-boot-starter-web</artifactId> </dependency> <dependency> <groupId>org.springframework.boot</groupId> <artifactId>spring-boot-starter-security</artifactId> </dependency> <dependency> <groupId>org.springframework.boot</groupId> <artifactId>spring-boot-starter-oauth2-resource-server</artifactId> </dependency> <dependency> <groupId>org.springframework.boot</groupId> <artifactId>spring-boot-starter-test</artifactId> <scope>test</scope> </dependency> </dependencies>After adding dependencies, Refresh maven changes using
Ctrl/Cmd + Shift + oin IntelliJ IDEA or any other method (depends on IDE). Some IDEs do this automatically.
Configure Resource Server
Edit src/main/resources/application.properties file and replace the code with following code:
spring.security.oauth2.resourceserver.jwt.issuer-uri=<Issuer URI>
Issuer URI is same which was used while creating Angular application in the previous article. If you are using Okta as an identity provider, then Issuer URI is https://${OktaDomain}/oauth2/default.
Create a file SecurityConfig.java inside security package and replace the code with the following code:
package dev.hashnode.hpareek.OAuth2DemoResourceServer.security;

import org.springframework.context.annotation.Configuration;
import org.springframework.security.config.annotation.web.builders.HttpSecurity;
import org.springframework.security.config.annotation.web.configuration.WebSecurityConfigurerAdapter;

@Configuration
public class SecurityConfig extends WebSecurityConfigurerAdapter {
    @Override
    protected void configure(HttpSecurity http) throws Exception {
        http.authorizeRequests()
                .anyRequest().authenticated()
                .and()
                .oauth2ResourceServer().jwt();
    }
}
In this code, we are configuring HttpSecurity to make sure that each request is authenticated and to use OAuth2 protocol for authenticating and authorizing requests. Now, restart the server and try to access http://localhost:8080/authors/all url again in a browser. You won't be able to access it, since we have secured our server to allow only authenticated requests.
Get Access Token
To access the protected resources at resource server, the request should contain some information about the authenticated user. This is done using authorization header. For OAuth2 protocol, we use Authorization: Bearer ACCESS_TOKEN header. We get ACCESS_TOKEN, when we authenticate to application using OAuth2. So, how do we get it?
Simple, run the angular application using ng serve command which we developed in previous article and open the url http://localhost:4200 in a private browser window. Open Developer tools in browser and switch to Network tab. Now, click on Login button and login using username and password. After successful login, in network tab, wee see a request to token endpoint. Click on this request to see the response. We see the response similar to the image below:
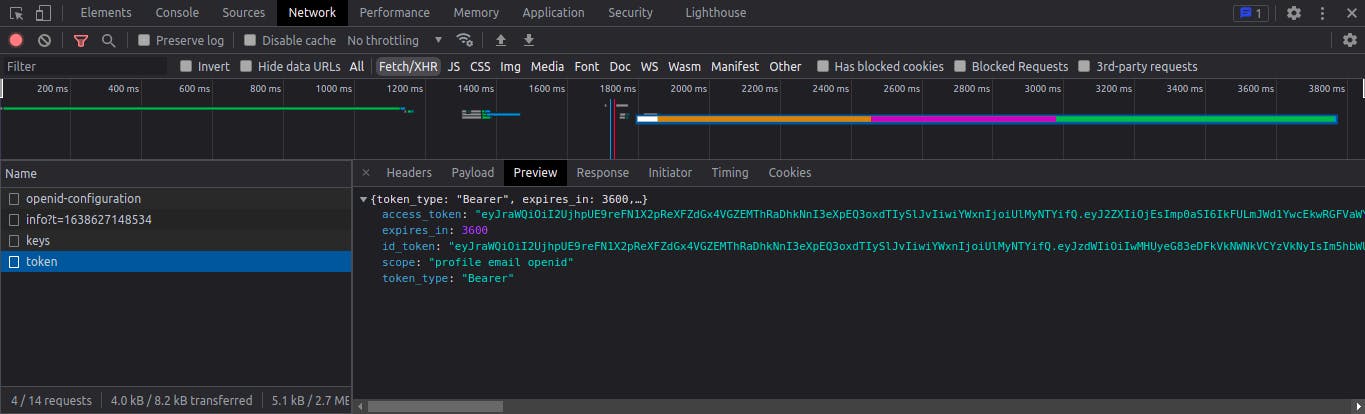 From the response copy the value of
 access_token field. This is the required ACCESS_TOKEN. Now, open any terminal and paste the following command to send a request to the resource server along with ACCESS_TOKEN:
curl -X GET --location "http://localhost:8080/authors/all" \
-H "Authorization: Bearer ACCESS_TOKEN"
You will get response like this:
["Author 1","Author 2","Author 3"]
Configure Angular App to send access token
Now, let's configure the Angular App to send access token with each request to resource server. Open app.module.ts file and replace the code with the below code:
import { HttpClientModule } from '@angular/common/http';
import { NgModule } from '@angular/core';
import { BrowserModule } from '@angular/platform-browser';
import { OAuthModule } from 'angular-oauth2-oidc';

import { AppComponent } from './app.component';

@NgModule({
  declarations: [
    AppComponent
  ],
  imports: [
    BrowserModule,
    HttpClientModule,
    OAuthModule.forRoot({
      resourceServer: {
        allowedUrls: ["http://localhost:8080"],
        sendAccessToken: true
      }
    })
  ],
  providers: [],
  bootstrap: [AppComponent]
})
export class AppModule { }
Here, we are defining resourceServer to send access_token with all requests which has prefix http://localhost:8080. Now, let's send a request to resource server from app. Open app.component.ts file and replace the code with the following code:
import { HttpClient } from '@angular/common/http';
import { Component } from '@angular/core';
import { OAuthService } from 'angular-oauth2-oidc';
import { authCodeFlowConfig } from './config/authCodeFlowConfig';

@Component({
  selector: 'app-root',
  templateUrl: './app.component.html',
  styleUrls: ['./app.component.css']
})
export class AppComponent {
  title = 'AngularOAuth2Demo';

  constructor(private oauthService: OAuthService,
    private _http: HttpClient
  ) {
    this.oauthService.configure(authCodeFlowConfig);
    this.oauthService.loadDiscoveryDocumentAndTryLogin();
  }

  login() {
    this.oauthService.initCodeFlow();
  }

  logout() {
    this.oauthService.logOut();
  }

  get name () {
    const claims = this.oauthService.getIdentityClaims();
    if (!claims) return null;
    const nameClaim = claims as {name: string};
    return nameClaim.name;
  }

  getAuthors() {
    this._http.get("http://localhost:8080/authors/all")
      .toPromise()
      .then(console.log)
      .catch(console.error);
  }

}
In getAuthors() method we are simply sending a request to http://localhost:8080/authors/all endpoint and printing the response to the console. Header Authorization: Bearer ACCESS_TOKEN will be added to it since we configured it in previous step. Now, create a button in app.component.html file to invoke getAuthors method using the following code:
<div>
  // Previous code should remain same
  <br />
  <button (click)="getAuthors()">Get Authors</button>
</div>
Now, restart the angular app and open the same url http://localhost:4200 in a private browser window. Login to the app by clicking on Login button. Open the developer tools and select Network tab. Click on Get Authors button. We can see a request sent to http://localhost:8080/authors/all endpoint with Authorization header.

Solve CORS Error
But, if we open the Console tab, we see an error that the request to the resource server is blocked by the CORS policy.
 This is because, by default we can not send request to another origin (server) from any server. To allow requests from Angular app to Resource Server, we need to do some configuration in Spring Boot Application.
Open SecurityConfig.java file inside security package and add http.cors() after other configurations:
http.authorizeRequests()
                .anyRequest().authenticated()
                .and()
                .oauth2ResourceServer().jwt();
        http.cors();
We need to configure individual controllers with CrossOrigin annotation. Open AuthorController.java file inside controllers package and add CrossOrigin annotation:
@CrossOrigin(origins = "http://localhost:4200") // allow requests from origin 'http://localhost:4200'
@RestController
@RequestMapping("/authors") // This class handles requests for /authors
public class AuthorController {
    // Rest of the code
}
Restart the Resource Server. Again click on Get Authors button in Angular app (make sure you are signed into the app). In the console, we can see the correct output:
 It's working. Wow.
Summary
You can find the source code of everything covered in the article here. In this article, we saw how to make resource server and how to send api requests to the server. We also got to know about CORS and how to solve it. In the next article, I will explain how to handle Authentication and Authorization failure errors in resource server and how to return appropriate response.
Your suggestions are welcome. Until then, bye and keep learning...