

Configure Multiple Git Accounts on a Single Computer
Learn how to use configuration files to configure git to use different git accounts and configuration variables for different repositories


Sometimes we need to work with multiple repositories or groups of repositories that use different git accounts on the same computer. Here, a git account refers to an account created on online version control system (VCS) platforms, such as Github, Bitbucket, Gitlab, etc. One way to accomplish this is to change the account information used by git whenever we switch repositories. But, keep changing this information is a tedious and error-prone task. We want to configure git such that, whenever we change repositories, it automatically picks up the correct information. Let's see how to do that...
Scenario
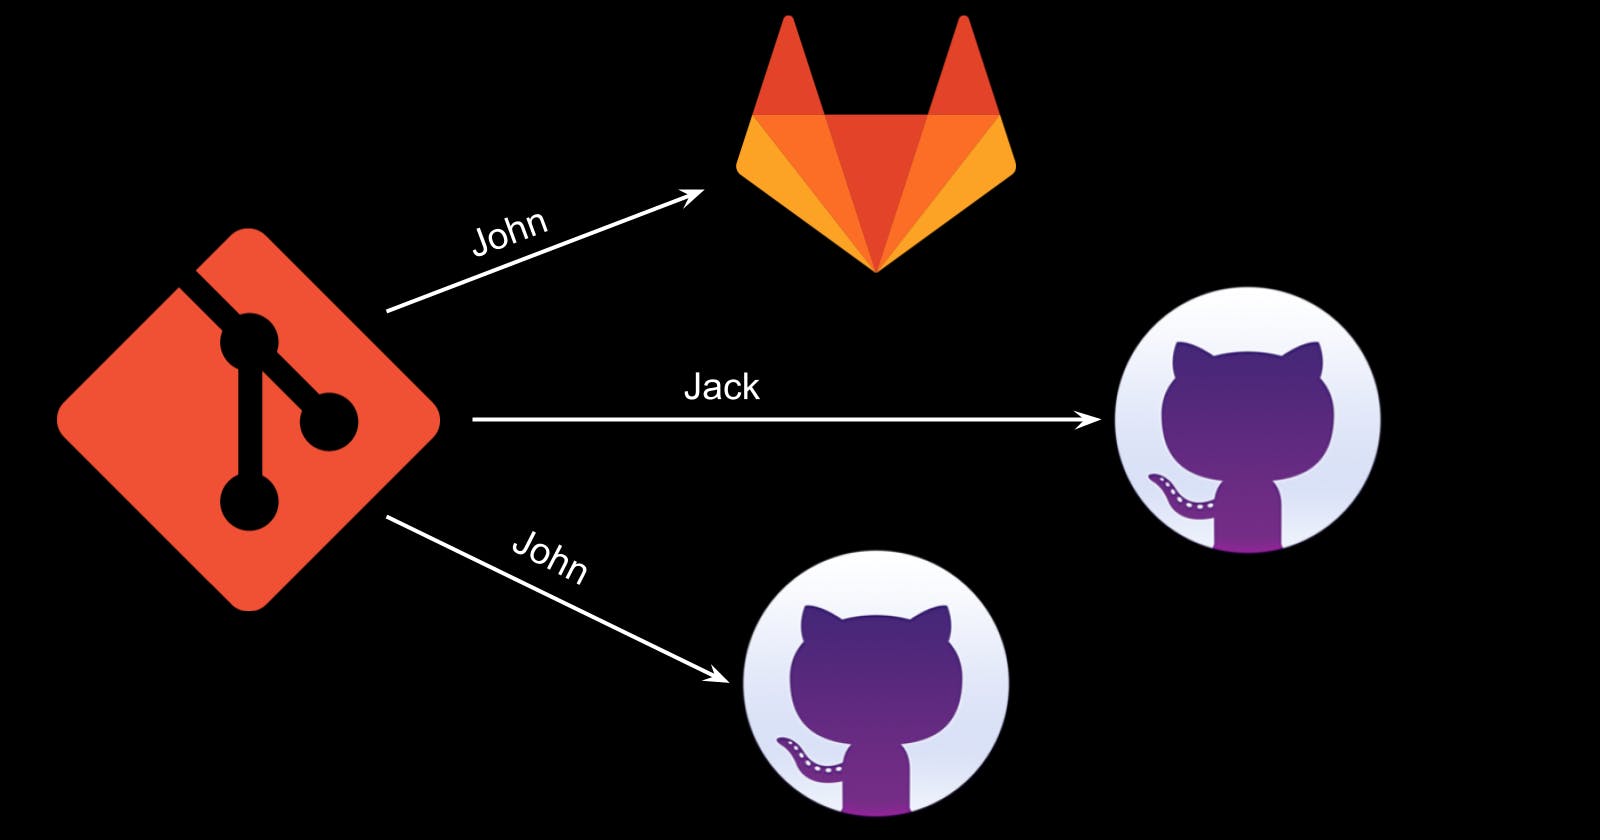
In this article, we will consider the following scenario:
We have 3 git accounts (Steps to get SSH User and Hostname are given below):
First Account
 # Account 1
 Name = John Doe
 Email = johndoe.codeready@gmail.com
 GitLab Username = @johndoe.codeready
 SSH User = git
 SSH Hostname = gitlab.com
Second Account
 # Account 2
 Name = Jack Smith
 Email = jacksmith.codeready@gmail.com
 Github Username = jack-codeready
 SSH User = git
 SSH Hostname = github.com
Third Account (Default Account)
 # Account 3
 Name = John Doe
 Email = johndoe.codeready@gmail.com
 Github Username = john-codeready
 SSH User = git
 SSH Hostname = github.com
To get the value of SSH User and Hostname for any account, do the following:
Login to the account.
Go to any repository (Create one if there is no repository).
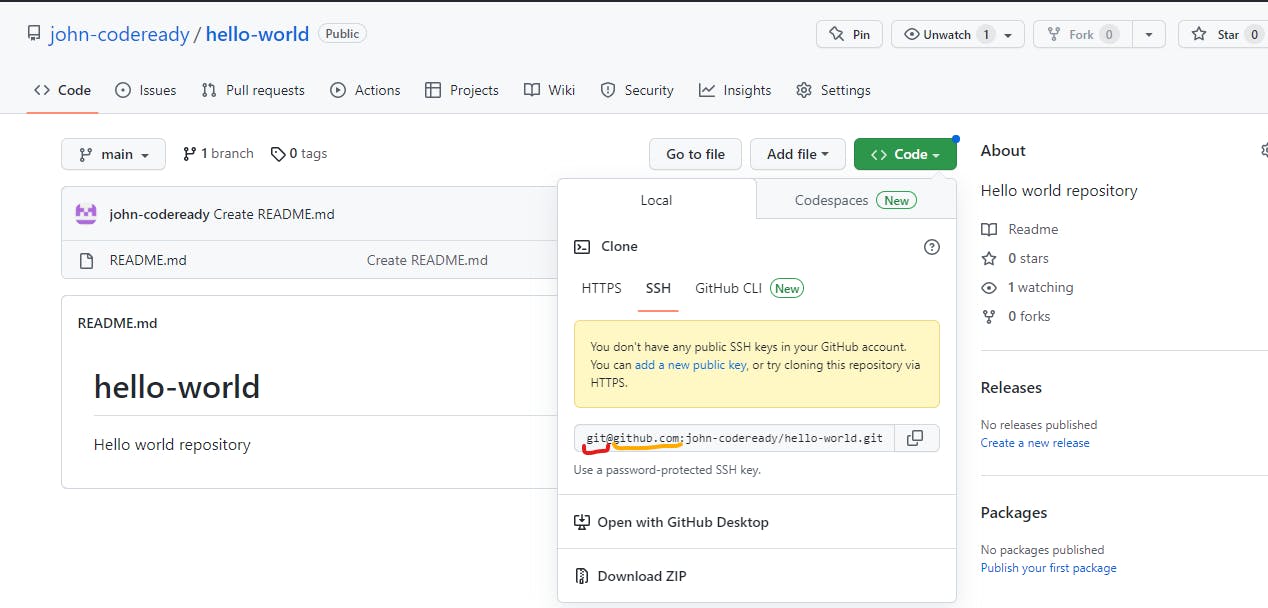
Click on the Code button for the GitHub repository or the Clone button for the GitLab repository.
Select SSH as the clone method.
Copy the SSH URL. It will be in the format of
{User}@{Hostname}:{Organization}/{Repository Name}.And you have the value of SSH
UserandHostnamefor that account.
The following screenshot is taken from Github. Here, SSH User is git and Hostname is github.com.
The following screenshot is taken from GitLab. Here, SSH User is git and Hostname is gitlab.com.
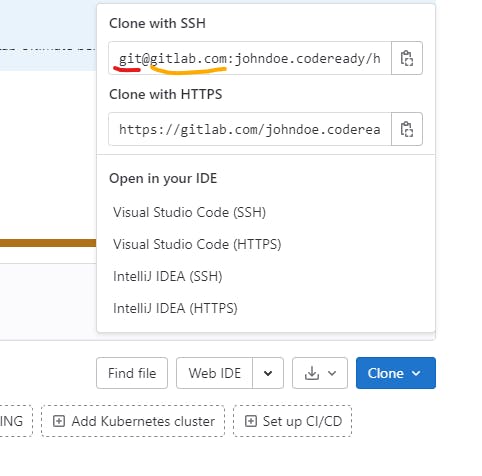
In most cases, the SSH User will be git, but it is better to follow the steps to get both the User and the Hostname.
We have 2 directories Projects and Development in home(~) directory.
Our goal is that for any repository inside Projects directory git should use Account1 and for any repository inside Development git should use Account2. For all other repositories, which are not in any of these directories, it should use Account3.
We want to use SSH for authentication and authorization and want to sign the commits using the correct GPG keys.
git-config FILES
By default, git reads configuration options from some pre-defined files. One of them is ~/.gitconfig. In this file, we can define some configuration options and can include other configuration files. These files contain information related to the git username, email, GPG sign key, etc. GPG keys are used to sign the commits while committing changes to any branch.
Git uses another file which is ~/.ssh/config to make an SSH connection to GitHub (or any other online VCS platform) to authorize the current user. This is used while cloning the repository, pulling/fetching changes from the online repository, pushing changes to the online repository, or any other git operations that include communication with GitHub.
Creating config files
Create a common / default config file
Create a file .gitconfig in the home directory. Update the ~/.gitconfig file with the following content:
# ~/.gitconfig
######### Common and Default Configuration for Git #########

# Congiguration for default user (Account 3, in this scenario)
# to be used by git
[user]
    # Personal name of the git user
    name = John Doe

    # Email Address of the git user
    email = johndoe.codeready@gmail.com

    # Signing key to sign the commits by this user
    # For now, it is empty
    # Later, we will generate it and will update this file
    signingKey =

# Configuration related to Commits
[commit]
    # Since, gpgsign = true, git will always sign the commits
    # Otherwise, whenever we want to sign the commits, we need
    # to use "-S" flag while commiting. Ex -
    # git commit -S -m "Commit Message"
    # And, often we forget to include this flag and that leads
    # to a lot of extra work
    gpgsign = true

# This condition check if the current git directory
# is inside "~/Projects/" path
[includeIf "gitdir:~/Projects/"]
    # In that case, we also use the configurations specified
    # in "~/.gitconfig.projects" file.
    # In "~/.gitconfig.projects" file, we can add new config values
    # or can updated the existing config values
    path = ~/.gitconfig.projects

[includeIf "gitdir:~/Development/"]
    path = ~/.gitconfig.development
In the above file:
We have specified the name, email, and signing key for the default user.
We have specified that we want every commit to be signed.
We instructed git to read configurations from
~/.gitconfig.projectsalso if the current repository is inside~/Projectsdirectory.We instructed git to read configurations from
~/.gitconfig.developmentalso if the current repository is inside~/Developmentdirectory.
Create config files for different accounts
Let's create 2 files (~/.gitconfig.projects and ~/.gitconfig.development ) for Account1 and Account2, respectively.
# ~/.gitconfig.projects
######### Configuration for Account1 #########

# Congiguration for Account1 to be used by git when we are inside
# "~/Projects/" repository
[user]
    # Personal name of the git user
    name = John Doe

    # Email Address of the git user
    email = johndoe.codeready@gmail.com

    # Signing key to sign the commits by this user
    # For now, it is empty
    # Later, we will generate it and will update this file
    signingKey =
# ~/.gitconfig.development
######### Configuration for Account2 #########

# Congiguration for Account2 to be used by git when we are inside
# "~/Development/" repository
[user]
    # Personal name of the git user
    name = Jack Smith

    # Email Address of the git user
    email = jacksmith.codeready@gmail.com

    # Signing key to sign the commits by this user
    # For now, it is empty
    # Later, we will generate it and will update this file
    signingKey =
For all 3 accounts, we will generate signing keys later.
Create SSH config file
Create a file config inside ~/.ssh/ directory, if it is not there. And put the following content there:
# SSH Configuration for Account1
# John Doe's GitLab Account
Host account1
    User    git
    Hostname    bitbucket.org
    IdentityFile # Location of identity file for account1 (will update later)
    AddKeysToAgent yes

# SSH Configuration for Account2
# Jack Smith's GitHub Account
Host account2
    User    git
    Hostname    github.com
    IdentityFile # Location of identity file for account2 (will update later)
    AddKeysToAgent yes

# SSH Configuration for Account3 (Default Account)
# John Doe's GitHub Account
Host account3
    User    git
    Hostname    github.com
    IdentityFile # Location of identity file for account3 (will update later)
    AddKeysToAgent yes
We are almost done with the configuration files. We need to generate SSH keys and GPG keys for each account and need to update the config files. Let's do that now.
Generate and Configure SSH Keys
For each account, follow these steps to generate, upload and use the SSH Keys.
Generate SSH Keys
Generate SSH Key using the following steps:
Open Terminal (Mac/Linux) or Git Bash (Windows).
Run the following command with the correct email address:
ssh-keygen -t ed25519 -C "johndoe.codeready@gmail.com"If you are asked to enter the file name to save the key, use a different filename for each account (You can include GitHub/GitLab username in the filename to make them unique for each account). In the following code snippet, I am using
/c/Users/himan/.ssh/id_ed25519_johndoe.codereadyas the filename forAccount 1. Herejohndoe.codereadyis the GitLab username ofAccount 1.Generating public/private ed25519 key pair. Enter file in which to save the key (/c/Users/himan/.ssh/id_ed25519): /c/Users/himan/.ssh/id_ed25519_johndoe.codeready
When asked, enter a passphrase for the ssh key. (You will be asked to enter the same passphrase twice). You must remember the passphrase.
If we look at the files inside
~/.sshdirectory, we see 2 files for one ssh key - One without any extension and one with.pubextension.The file without any extension is Private Key and the file with the extension
.pubis Public Key. Don't share your Private Key with anyone. We will upload the Public Key to GitHub or GitLab.
Upload Public SSH Key to GitHub / GitLab
Follow these steps to upload the public ssh key (one with .pub extension) to GitHub or GitLab:
Copy the content from Public SSH Key. The SSH key file has
.pubextension.If the account is related to Github, go to https://github.com/settings/keys and click on the New SSH Key button.
If the account is related to GitLab, go to https://gitlab.com/-/profile/keys.Give some Title/Label to the key.
If asked for the Key Type, select Authentication Key.
Paste the copied content in the Key textbox.
Click on Add Key button.
Configure the ssh-config file to use the ssh-key
Now, add the path of the Private SSH Key file for the value of IdentityFile variable in the ~/.ssh/config file for the correct account.
After following all the 3 steps for all accounts, we created SSH keys for each account, uploaded public SSH keys to the corresponding online VCS account and we have added the location of private SSH keys inside ~/.ssh/config file. The ~/.ssh/config should look like this:
# SSH Configuration for Account1
# John Doe's GitLab Account
Host account1 # ssh -T account1
    User    git
    Hostname    gitlab.com
    IdentityFile    ~/.ssh/id_ed25519_johndoe.codeready
    AddKeysToAgent  yes

# SSH Configuration for Account2
# Jack Smith's Github Account
Host account2 # ssh -T account2
    User    git
    Hostname    github.com
    IdentityFile    ~/.ssh/id_ed25519_jack-codeready-github
    AddKeysToAgent yes

# SSH Configuration for Account3 (Default Account)
# John Doe's Github Account
Host account3 # ssh -T account3
    User    git
    Hostname    github.com
    IdentityFile    ~/.ssh/id_ed25519_john-codeready-github
    AddKeysToAgent yes
Now, let's test if the SSH configuration is working or not.
Run the following command to authenticate Account 1 :
ssh -T account1
If it is the first time connecting to this account, it will ask for confirmation, type yes and press Enter.
When asked for a passphrase, enter the passphrase created while generating the corresponding ssh keys.
Then, it will show a message that you are authenticated using ssh.
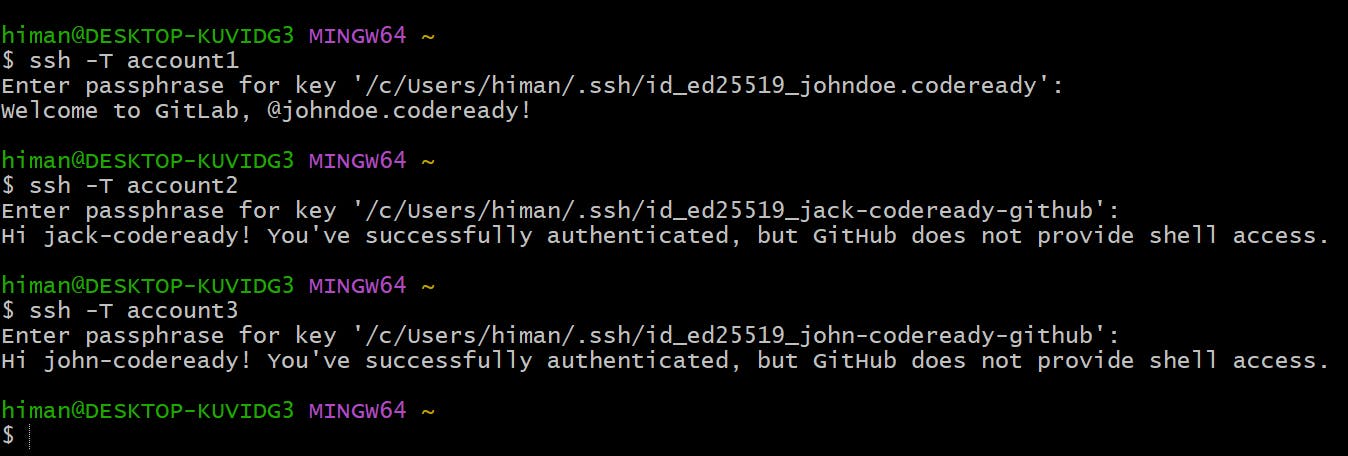
Thus, we can connect to the git accounts using the correct ssh keys. It's time to configure GPG keys so our commits are signed correctly. Let's do that now.
Generate and Configure GPG Keys
For each account, do the following to generate, upload and configure the GPG key.
Generate GPG Key
Open Terminal / Git Bash.
Run the following command:
gpg --full-generate-keyAt the prompt, specify the kind of key you want. Type
1and pressEnterto accept the default.When asked for the length of the key, specify
4096.Enter the length of time for which the key should be valid. If you don't want the key to expire, type
0and pressEnter.When asked for confirmation, specify
y.When asked, enter your real name.
Then enter the email address related to the account.
Then you need to add a comment to the GPG key. Add something specific to the account so that later you can recall the purpose of the key. For instance, I have specified
John Doe - GitLab Accountas a comment forAccount 1.Type a secure passphrase (and re-type it).
Run the following command to list the GPG keys:
gpg --list-secret-keys --keyid-format=longThe output will be similar to the following (You may have more than one key).
sec   rsa4096/75BDED420C522BEB 2022-12-22 [SC]
      AE815B28610907D3A31E19BD75BDED420C522BEB
uid                 [ultimate] John Doe (John Doe - GitLab Account) <johndoe.codeready@gmail.com>
ssb   rsa4096/08310F3B00DB38D1 2022-12-22 [E]
Copy the long form of the GPG key id that you want to use (The comment related to the key can be useful to recognize the key). In the above example, the GPG key Id is
75BDED420C522BEB.Run the following command to get the Public GPG key for the above id (Replace the id with your id):
gpg --armor --export 75BDED420C522BEB # Prints the GPG key ID, in ASCII armor formatThe output will be similar to the following:
-----BEGIN PGP PUBLIC KEY BLOCK-----

mQINBGOkiMwBEACzHZDQUmibFy3/jBNBROBHG5CridNUorgW8dBzbNyw9hyV5FYL
# Some more stuff
=Wci4
-----END PGP PUBLIC KEY BLOCK-----
Copy the whole output, which is your Public GPG key.
Upload Public GPG Key to Account
For the GitHub account, go to https://github.com/settings/keys and click on the New GPG Key button.
For the GitLab account, go to gitlab.com/-/profile/gpg_keys.
Paste the public GPG key in the text box and click on the Add Key button.
Update git config file with Id of GPG key
Paste the id of the GPG key (75BDED420C522BEB in this case) as the value of the signingKey variable in the appropriate git config file, which we created earlier. In this case, since this is for Account 1. So, I will put it in the ~/.gitconfig.projects file.
After the above steps, below are the 3 updated config files:
~/.gitconfig
# ~/.gitconfig
######### Common and Default Configuration for Git #########

# Congiguration for default user (Account 3, in this scenario)
# to be used by git
[user]
    # Personal name of the git user
    name = John Doe

    # Email Address of the git user
    email = johndoe.codeready@gmail.com

    # Signing key to sign the commits by this user
    signingKey = FF650CD14C619C34

# Configuration related to Commits
[commit]
    # Since, gpgsign = true, git will always sign the commits
    # Otherwise, whenever we want to sign the commits, we need
    # to use "-S" flag while commiting. Ex -
    # git commit -S -m "Commit Message"
    # And, often we forget to include this flag and that leads
    # to a lot of extra work
    gpgsign = true

# This condition check if the current git directory
# is inside "~/Projects/" path
[includeIf "gitdir:~/Projects/"]
    # In that case, we also use the configurations specified
    # in "~/.gitconfig.projects" file.
    # In "~/.gitconfig.projects" file, we can add new config values
    # or can updated the existing config values
    path = ~/.gitconfig.projects

[includeIf "gitdir:~/Development/"]
    path = ~/.gitconfig.development
~/.gitconfig.projects
# ~/.gitconfig.projects
######### Configuration for Account1 #########

# Congiguration for Account1 to be used by git when we are inside
# "~/Projects/" repository
[user]
    # Personal name of the git user
    name = John Doe

    # Email Address of the git user
    email = johndoe.codeready@gmail.com

    # Signing key to sign the commits by this user
    signingKey = 75BDED420C522BEB
~/.gitconfig.development
# ~/.gitconfig.development
######### Configuration for Account2 #########

# Congiguration for Account2 to be used by git when we are inside
# "~/Development/" repository
[user]
    # Personal name of the git user
    name = Jack Smith

    # Email Address of the git user
    email = jacksmith.codeready@gmail.com

    # Signing key to sign the commits by this user
    signingKey = C8A49A252EF556F7
How to use it?
If you create any git repository inside Projects directory, Git will automatically pick the configurations for Account 1 and so on. You can also clone repositories for Account1 inside Projects repository using the below command:
git clone account1:johndoe.codeready/hello-gitlab.git
And whenever you commit any changes, Git will ask for the passphrase for the GPG key and it will sign the commits with the correct GPG key based on which directory you are in.
That's it for this article. It is a long one, but it can save you a lot of time later if you work on multiple projects involving different accounts on a single machine. You don't need to change configurations for Git whenever you change the project/directory.